1) bricks/element/settings
This filter already in Bricks since v1.5. (Documentation Link) It allows you to tweak the element settings before rendering it. This looks useless, why the hell I need to do that in code instead of builder itself?! Exactly, what if the field in the builder do not have dynamic data (thunder sign icon) for you?
To me, if unable to use dynamic data on certain fields in Bricks builder, I will use bricks/element/settings to set the value I want. However, not all settings can take effect / being used in render function even you can see them in $settings array from the hook. Ex: Element Condition settings cannot be tweak because it was executed before this filter. Some settings related to CSS unable to tweak too because those are handle by different function in Bricks.
// Example
add_filter('bricks/element/settings', 'itchy_change_element_settings', 10, 2);

function itchy_change_element_settings($settings, $element)
{
    // Usually you will check element id here to target the correct element
    if ($element->id !== 'ahajhp') return $settings;
    // Now we can change the settings for this element
    var_dump($settings); // This will show you the current settings as reference
    return $settings;
}
Use Case 1: Countdown Timer With Dynamic Value
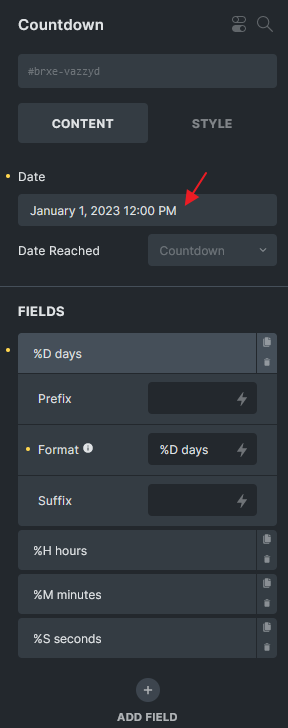

Look at the countdown element, the Date field will trigger a date picker popup, and you are not allowed to set this to dynamic. What if I wish to use this countdown timer to show on home page to alert visitor that our sales will be ended on a date, which defined in a ACF / Metabox / JetEngine option field?
To change the element settings, first must use var_dump() the settings so you will know which array key to be tweaked later. Different element has different key.
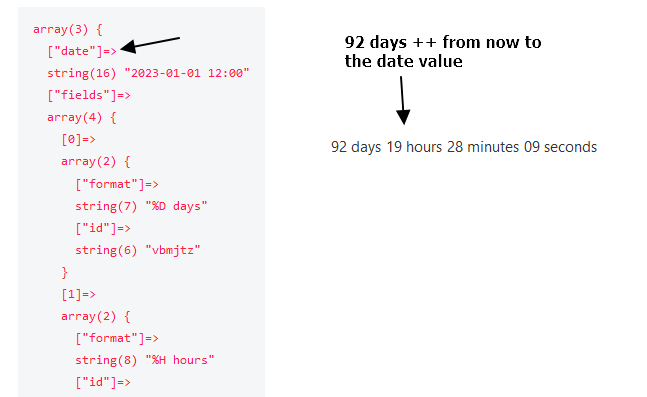
Once identify the target key, just use the filter like this.
add_filter('bricks/element/settings', 'itchy_change_element_settings', 10, 2);
function itchy_change_element_settings($settings, $element)
{
if ($element->id !== 'vazzyd') return $settings;
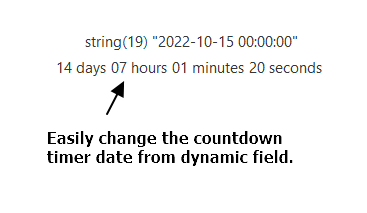
// Example if you want to hard code it to 1st October 2022
// $settings['date'] = '2022-10-01 00:00:00';
// Example if you want to get from JetEngine option field
// Get field value using Bricks dynamic tag helper function, or you could use JetEngine function
// je-web-setting is my opton page slug, sales-end is my field
$sales_end_from_je = \Bricks\Integrations\Dynamic_Data\Providers::render_tag('je_je-web-setting_sales-end', get_the_ID(), 'option');
$sales_end_date_object = new DateTimeImmutable($sales_end_from_je, wp_timezone());
$settings['date'] = $sales_end_date_object->format('Y-m-d H:i:s');
return $settings;
}
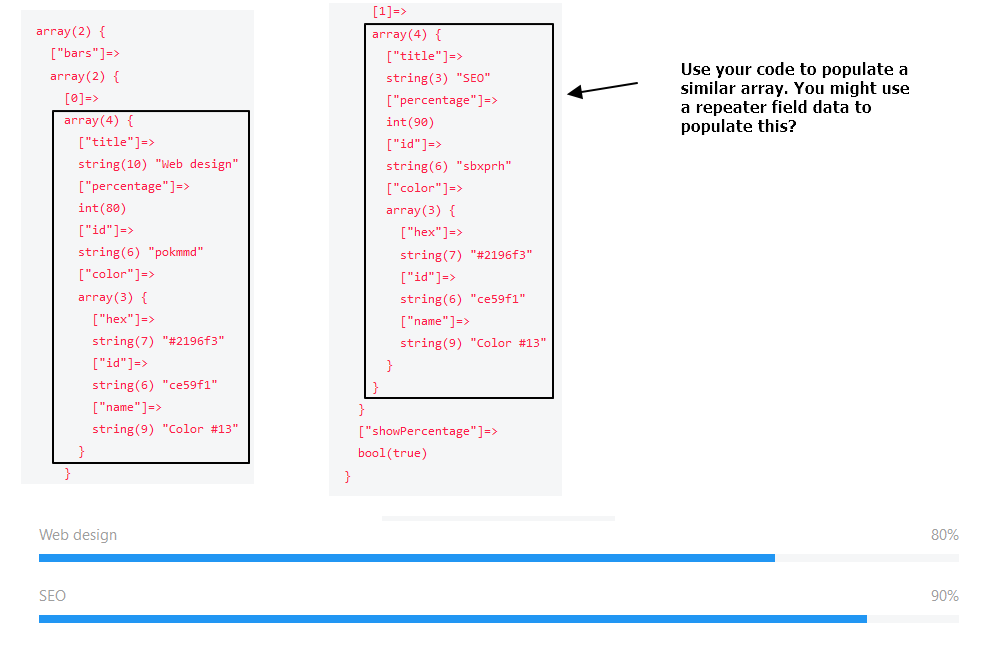
Use Case 2: Change Progress Bar element’s data
I might setup repeater data in a CPT, and use progress bar to populate the data. Well, the progress bar percentage field do not have dynamic data support, I am not able to render my repeater data as individual bar as well.
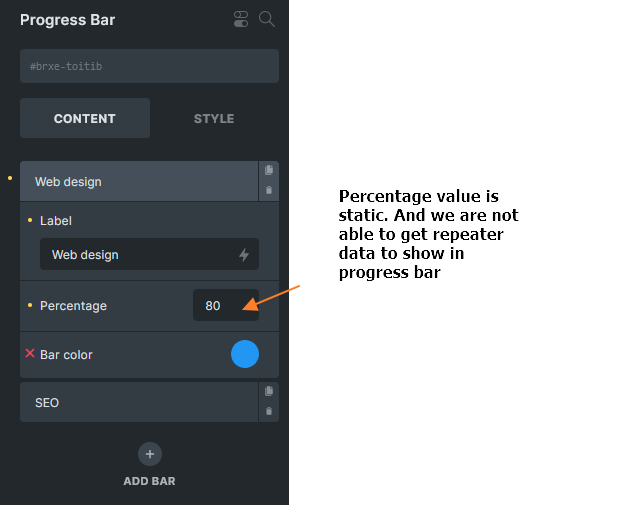
As usual, var_dump the settings, you will notice the pattern of the bars array. Then use your PHP skill to retrieve data from repeater field, populate your own data array and replace the original settings.
<?php

add_filter('bricks/element/settings', 'itchy_change_container_background', 10, 2);

function itchy_change_container_background($settings, $element)
{
    if ($element->id !== 'toitib') return $settings;
    // Example to add more bars to the progress bar
    // Use your creativity to retrieve real data from your desired source
    $settings['bars'][] = [
        'title'      => 'Hello',
        'percentage' => 50,
    ];
    $settings['bars'][] = [
        'title'      => 'World',
        'percentage' => 99,
    ];

    return $settings;
}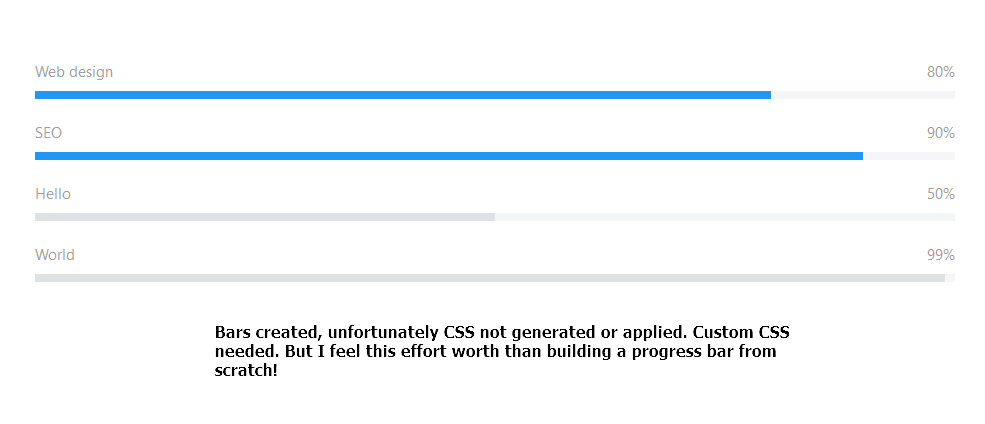
Check again, new bars can easily created. But CSS not applied, this is expected because Bricks generate CSS from other logic, and too bad don’t have available hook for now. I will write some CSS for the bar color which is pretty worth with the effort if compare to create a progress bar from scratch or third party plugin.
2) bricks/frontend/render_data
This filter just added in v1.5.4. It’s not documented yet and might be changed or removed in future. This filter allows you to change the generated HTML before render in frontend. It’s not based on each element, it’s for the whole content.
<?php

add_filter('bricks/frontend/render_data', 'itchy_change_render_data', 10, 3);

function itchy_change_render_data($html, $post, $area)
{
    // $area could be 'header, 'footer', 'content'
    // Here you can change the HTML output
    // If I want to change the content area and only on page with slug test-page, I can do this
    if ($area !== 'content' || !is_page('test-page')) return $html;

    return $html;
}
Use Case: Add CSS class to Button Icon
In a recent project, I need to add additional CSS class to the icon of the Button element. However, I don’t see anyway or available hook to do it. The only thing I can do is use str_replace to find the icon html and replace with the one with additional class by using bricks/frontend/render_data. (Yup, maybe I can use JavaScript but I prefer to do it in backend which the class will be ready on page load)
Solution:
<?php

add_filter('bricks/frontend/render_data', 'itchy_change_render_data', 10, 3);

function itchy_change_render_data($html, $post, $area)
{
    if ($area !== 'content' || !is_page('test-page')) return $html;

    // Here I can change the HTML output
    $html = str_replace('<i class="ti-save"></i>', '<i class="ti-save jet-data-store-link__icon"></i>', $html);
    return $html;
}
I am not sure how heavy of this process is and whether this str_replace will affect the render performance or not, but it’s working good to me.