I always use JetSmartFilters and JetEngine Listing Grid element to build archive page in Elementor based websites. Since the default AJAX loading state is similar to JetEngine Listing Grid Load More mode (before v2.11.11), which is only set opacity of the target listing grid to 0.5 and not really obvious to end user. Sometimes if the server processing speed slow, visitor might thought the website is “hanging”. I prefer to create my own loading spinner.
Tutorial Environment Setup
- WordPress 6.0
- Elementor 3.6.6
- Elementor Pro 3.7.2 (Optional, I just use it to style some widgets.)
- JetEngine 2.11.11 (Tested in 3.0.0)
- JetSmartFilters 2.3.12
- PHP 7.4
- Open LiteSpeed Server
- All custom codes in this tutorial place in theme / child theme functions.php
Plan / Expected Result
Similar to my previous JetEngine tutorial, I will set my plan as below.
1) While making AJAX call (Filters applying)
- Hide the product listing
- Display my custom design loading spinner + “Loading” text
2) After AJAX call completed (Filters applied)
- Hide my custom loading spinner div
- Show the filtered listing
Step 1: Prepare A Page With Filters And Listing Grid
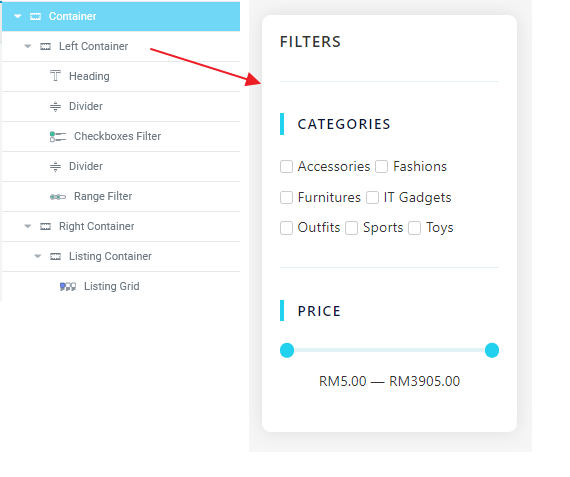
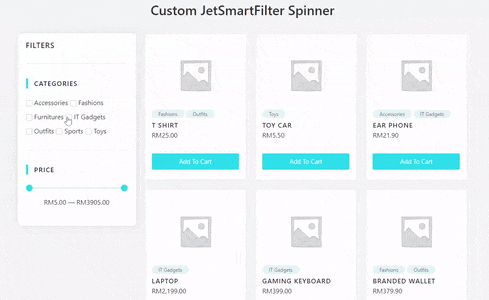
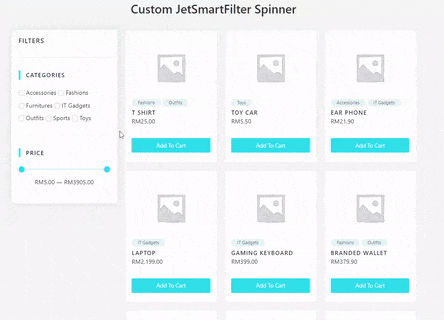
I create a new page and separate it into 2 columns. Left column for filters and right column for product listing grid.
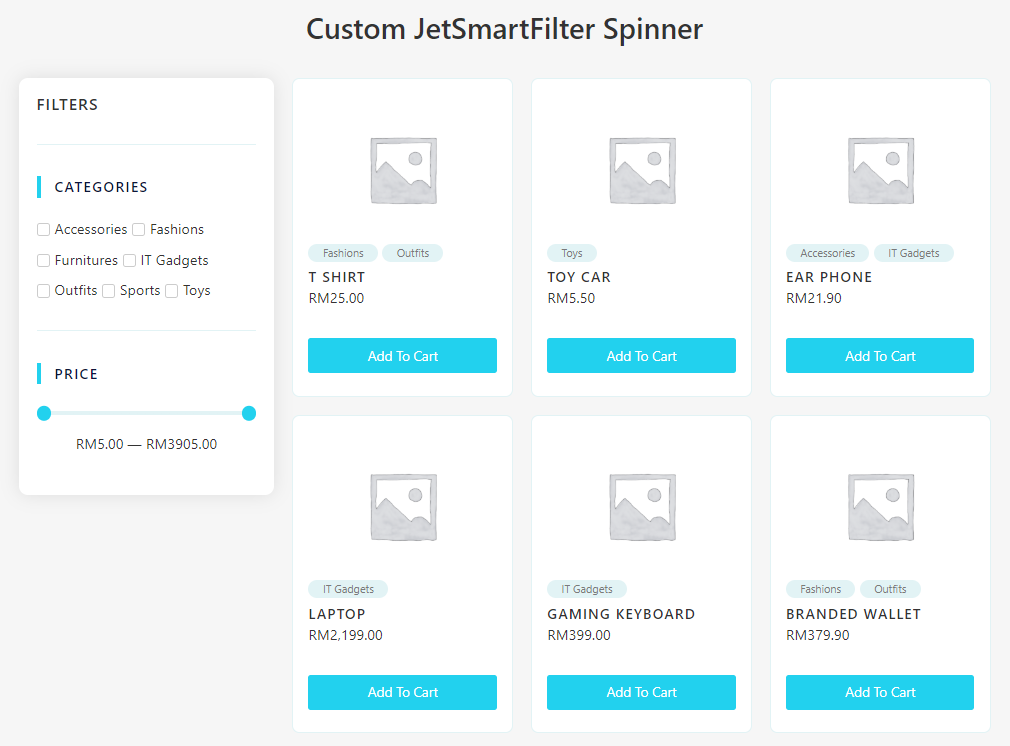
2 filters were added, checkbox filter for product category taxonomy and range filter for product price. Of course some dummy products should be ready for the test as well.
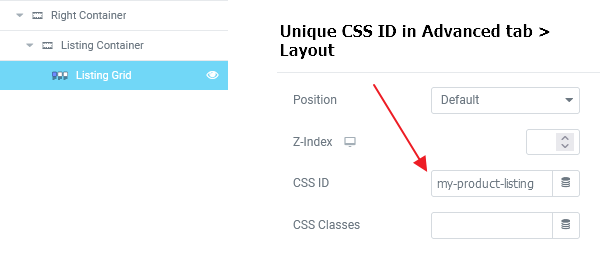
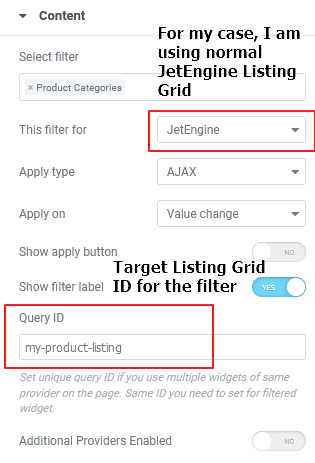
Important thing for this step are the IDs. I assigned unique CSS ID (my-product-listing) for the listing grid. And at the same time set the Query ID on my filters. This will avoid the irrelevant listing being filtered unexpectedly.
Once setup done, the filters should work in frontend. The listing grid’s opacity will be set to 0.5 while filter applying and back to 1 once filter applied. (Default behavior)
Step 2: Design Custom Loading Spinner
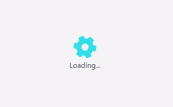
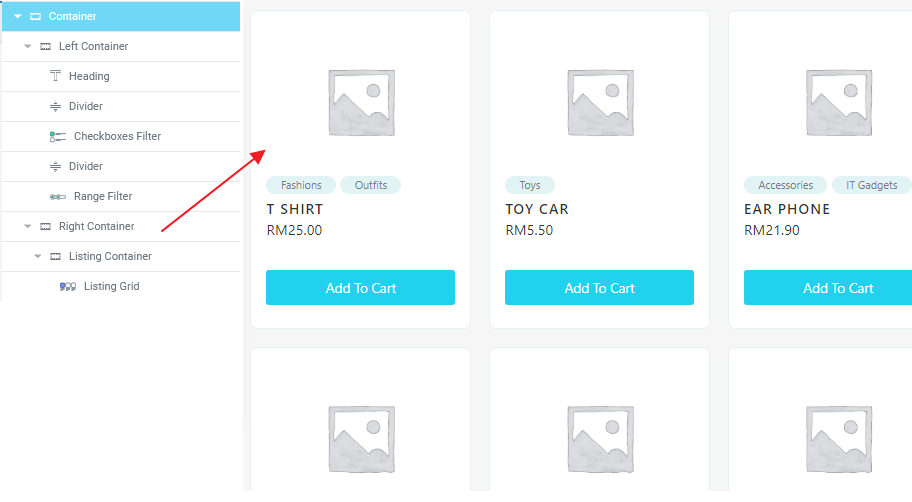
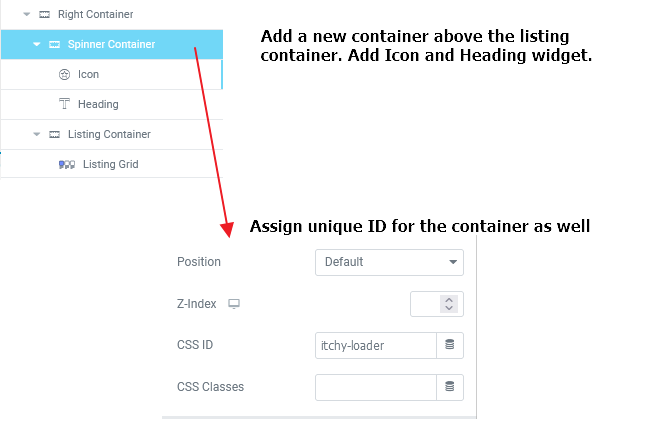
Alright, let’s head back to Elementor builder, create a container above the listing grid. Set a min-height 300px and give it unique ID as well (itchy-loader). Then add an Icon widget and Heading widget. (Actually just design as you like)
To make the icon spinning, just simply add animation in css. fa-spin animation is provided by Font-awesome by default.
/*For Elementor Pro, just add below CSS into Container widget Custom CSS field*/
selector i {
-webkit-animation: fa-spin 2s infinite linear;
animation: fa-spin 2s infinite linear;
}
/*Otherwise, just add below CSS and follow your spinner container ID*/
#itchy-loader i {
-webkit-animation: fa-spin 2s infinite linear;
animation: fa-spin 2s infinite linear;
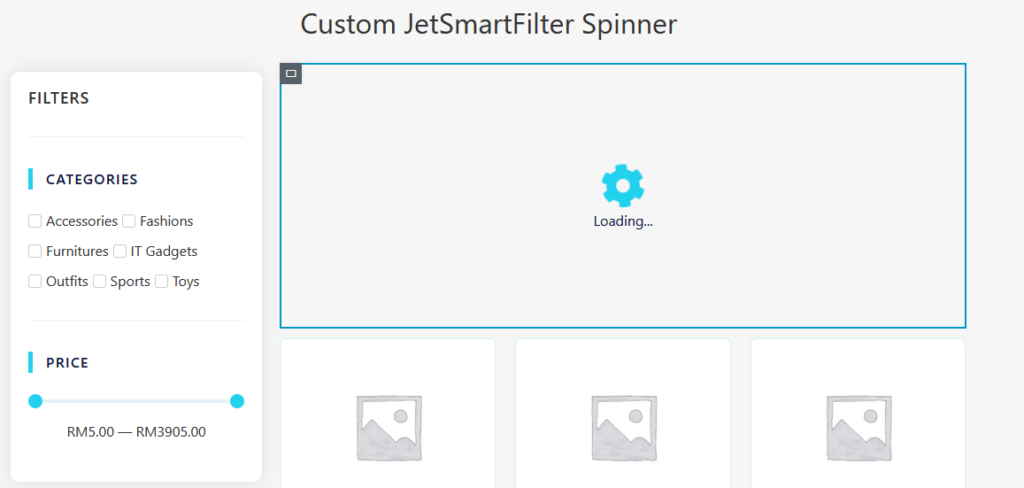
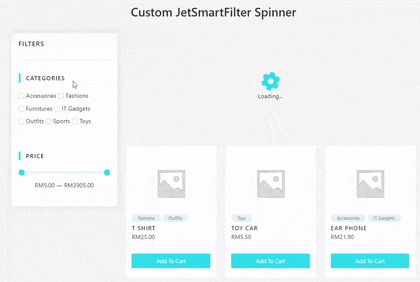
}Once done, now your frontend should looks like this.
Since I want the spinner div hide by default, just tweak the CSS display property will do. And the final custom CSS should looks like this.
/*For Elementor Pro User*/
/*In the custom spinner container widget Custom CSS field */
selector {
    display:none;
}
selector i {
    -webkit-animation: fa-spin 2s infinite linear;
    animation: fa-spin 2s infinite linear;
}

/*Others*/
#itchy-loader {
    display:none;
}
#itchy-loader i {
    -webkit-animation: fa-spin 2s infinite linear;
    animation: fa-spin 2s infinite linear;
}
Step 3: JavaScript Events
Okay, to achieve this customization, JavaScript event playing important role. Different with Load More mode and Infinite Scroll mode in JetEngine Listing Grid, JetSmartFilters using event bus (publish + subscribe pattern). Hence, we can easily listen / subscribe to the event to show and hide our elements instead of listening to AJAX global event like previous tutorial.
// _dev/src/js/FilterGroup.js

...
	startAjaxLoading() {
		eventBus.publish('ajaxFilters/start-loading', this.provider, this.queryId);
	}

	endAjaxLoading() {
		eventBus.publish('ajaxFilters/end-loading', this.provider, this.queryId);
	}
...
Above codes from JetSmartFilters before minified as public.js file. We can subscribe to ajaxFilters/start-loading and ajaxFilters/end-loading events via window.JetSmartFilters.events variable. Please take note that JetSmartFilters only initialize when jQuery document ready event fired.
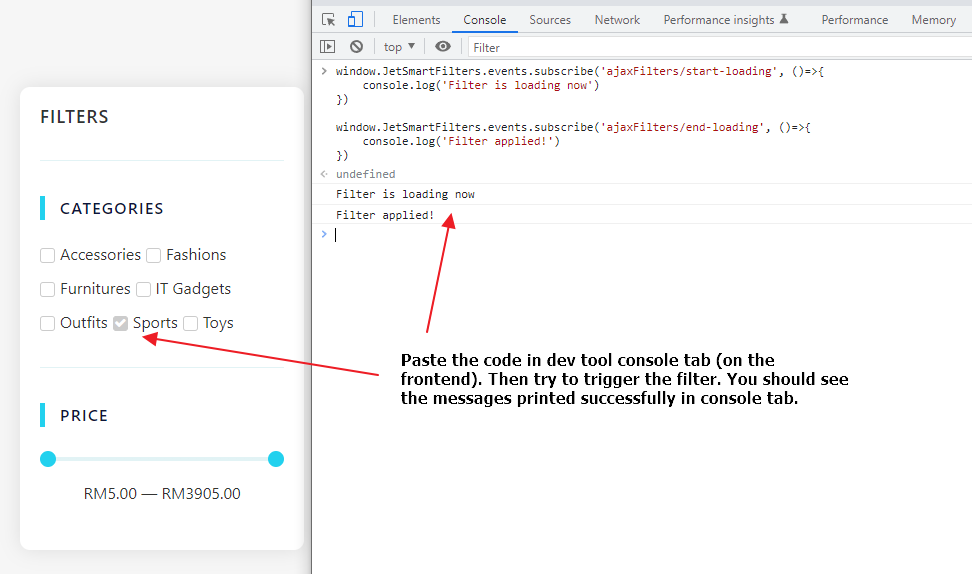
To do a test, you could copy the JavaScript codes below and paste on the JetSmartFilter page to check if messages printed in console tab successfully or not.
window.JetSmartFilters.events.subscribe('ajaxFilters/start-loading', ()=>{
	console.log('Filter is loading now')
})

window.JetSmartFilters.events.subscribe('ajaxFilters/end-loading', ()=>{
	console.log('Filter applied!')
})
Step 4: Complete Code
Once you got the correct event, the rest will be easy and straight forward. As usual, I will use wp_footer action hook to embed my JavaScript code.
<?php
add_action( 'wp_footer', 'itchycode_enhance_jetsmartfilters_loading_spinner' );

function itchycode_enhance_jetsmartfilters_loading_spinner() {
	//Only target on one of my page, jetsmartfilter-jetlisting-custom-spinner is my page slug
	if( ! is_page('jetsmartfilter-jetlisting-custom-spinner') ) return;

	?>
		<script>
			document.addEventListener('DOMContentLoaded', function() {
				(($)=>{
					//We must wait for the jQuery ready event because JetSmartFilters is not initialized yet
					$(document).ready(function(){

						//Get the spinner container
						const spinnerContainer = document.getElementById('itchy-loader');

						//Get the listing container
						const listingContainer = document.getElementById('my-product-listing');

						if(spinnerContainer && listingContainer) {

							//Subscribe start loading event bus by JetSmartFilters
							window.JetSmartFilters.events.subscribe('ajaxFilters/start-loading', ()=>{
								spinnerContainer.style.display = 'flex';
								listingContainer.style.display = 'none';
							})

							//Subscribe end loading event bus by JetSmartFilters
							window.JetSmartFilters.events.subscribe('ajaxFilters/end-loading', ()=>{
								spinnerContainer.style.display = 'none';
								listingContainer.style.display = 'flex';
							})
						}

					})
				})(jQuery)
			});
		</script>
	<?php
}

?>
Read through the comment and customize as per your needs.
Result
Hope this article can help you to improve the user experience of JetSmartFilters temporary. I believe Crocoblock team will enhance it very soon.
Love this article. However, I had a hard time getting the window.JetSmartFilters.events.subscribe to work. Turns out that if the gird is set to lazy load this does not work. In fact, if there are any grids on the page with lazy load set on them the window.JetSmartFilters.events.subscribe does not work.
I have two grids on a page. One is for the normal grid and the one below it in a separate section is for previously viewed items, (no ID set). When I turned off the lazy load on the normal grid it worked. But once I viewed one of the items and went back to the grid page it stopped working and that is because the previously viewed grid had an item in it and was set to lazy load. Once I turned off the lazy load for that grid as well the loader started working with no issues.
Hi Ken, if you enable lazy-load, try wrap the from line 13 - 34 inside code below:
$( document ).on( 'jet-engine/listing-grid/after-lazy-load', (evt, args, response )=>{

//line 13 - 34

})
But if you got 2 different listing with different setting, better make line 13 - 34 as a function, then call it 2 times, one in document ready, another on 'jet-engine/listing-grid/after-lazy-load'.
Hope this help, if unclear, please drop me email.